The Inventory App.

This was the final project that I studied for and created on my Android Basics Nanodegree by Google and it was to be done in two parts. In the first part we were to focus on what happens behind the scenes – designing and implementing a simple database using SQLite; creating a table and then populating that table with new entries, modifying the entries and displaying the contents of the table to users. The practice app that we used in preparation for our project was an app to track pets in an animal centre in which we had to create a list of existing pets, and let the users add and edit the pets – names, weights, breed and so on. During the second part, the practice part was to build a user interface so that we could manipulate the database more easily.

The final project was to create our own Inventory app that would allow a store to keep track of it’s inventory. The brief was to:-

  • Be able to store information on a SQLite database
  • Integrate Android’s file system into that database
  • Present information from files and SQLite databases to users.
  • Be able to update information based on user input.
  • And create intents to other apps using stored information.
This is what the front page of the app looks like when the database is empty.

When the database is empty there is a message on the front of the app encouraging users to enter products into the database. On clicking the “kebab” menu in the top right hand corner there is an option to add sample data for testing but the usual way to add data to the database is to click on the green button on the bottom right of the page which takes you to:-

The “Add a product” page.

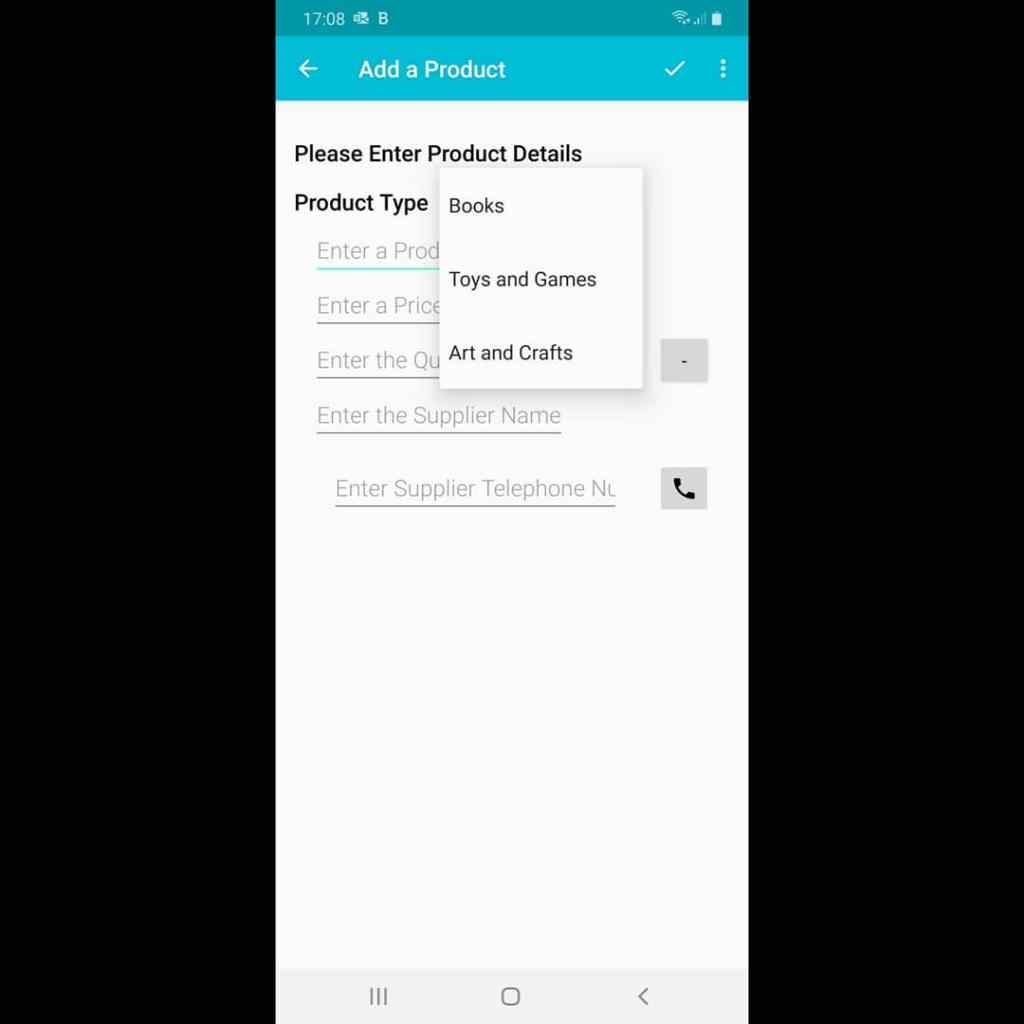
On the “Add a Product” page you can add relevant data about your product. On this page you can enter the product name, price, quantity with the additional function of making small adjustments with “+” and “-” buttons, the supplier name and the supplier telephone number which links via an intent to the telephoning intent. The app is based on the idea of a book, stationery and toy shop so there is a drop down list to select whether the product is a Book, a toy or a stationery item.

This is what the front page of the app looks like when the database is populated:-

The front page of the app when populated.

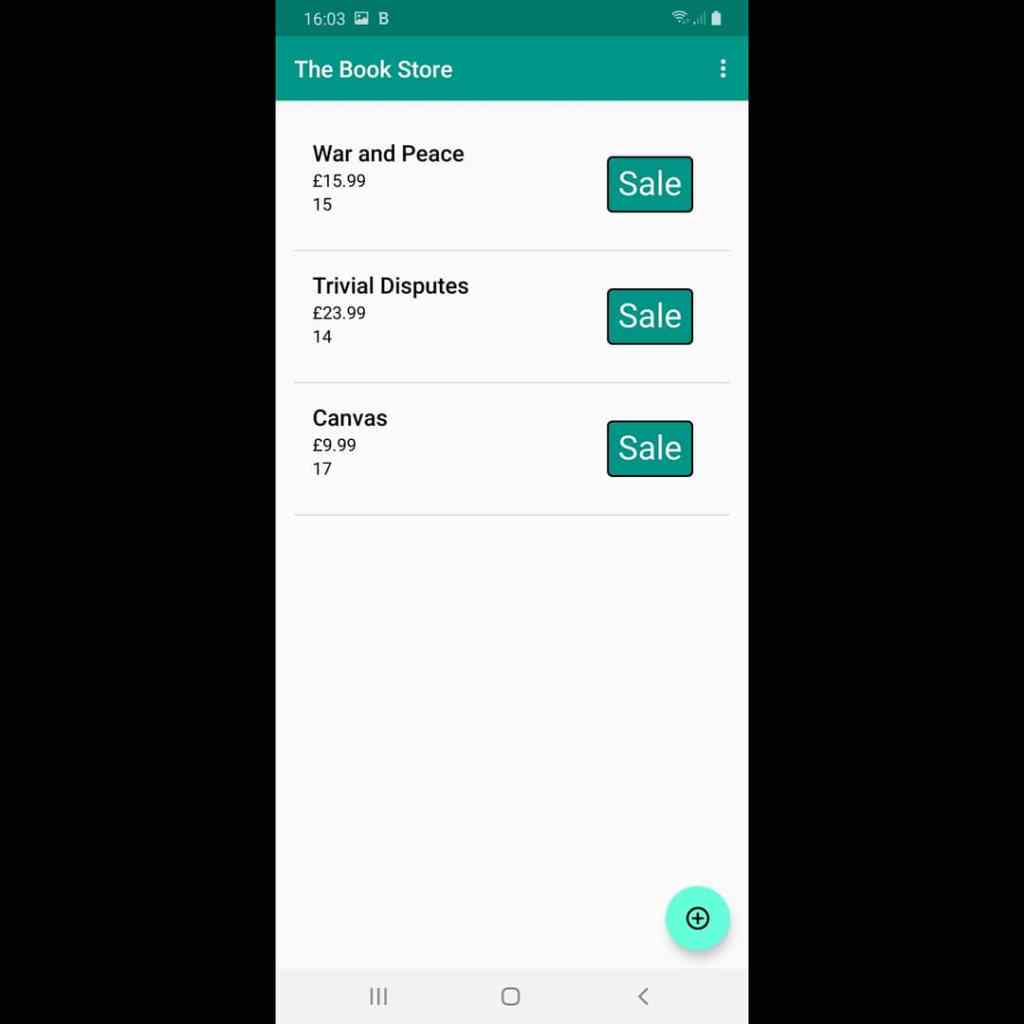
The type in bold shows the product name, below that is the price and below that is the number in stock. A sale is recorded by pressing the “Sale” button on the relevant item which reduces the stock number by one. If you click on the product instead, you can edit the details of the product in the case of inaccurate description, price or stock level. The “kebab” menu also allows a menu option to clear the whole database of entries. It was decided that we should only create a simple user interface because the emphasis was to create a usable database but I am sure that this app could be “prettied” and expanded to make it into of commercial value without much change to how it operates.

After I had submitted this project and tied up a few loose ends like making sure that I had been communicative enough on the Slack channels and Udacity blogs – they, quite rightly, put a lot of emphasis on community and communication – it had to wait for the verdict on my last project before graduation. We were also strongly encouraged to build our networks on LinkedIn and Facebook. I had been in LinkedIn and Facebook for some time before but my followers and the amount of people that I follow grew quite a bit as a result of this experience. I am a member of Udacity Graduate Alumni groups on LinkedIn, Facebook and Slack and it is useful to have people with a shared experience to converse with, support and receive support from.

Next time…. Graduation!!!

The News App – Part 1.

The next stage of my journey with Udacity involved creating an application which takes a JSON feed from an Application Programming Interface (API) and use selective parts of the JSON feed to display news on the app. We used the freely available U.S. Geological survey website API to build an app called “Quake app” which told us where in the world there was an earth quake and of what magnitude – we then created various filters like only show quakes above 5.0 on the Richter Magnitude scale. This was all with code fed to us by Udacity. We then took quake app and used it to create an app for displaying news. We were to:-

  • Search the internet for available APIs from official news sources.
  • Obtain an API key if necessary.
  • Using the quake app as a template, create our news app.

I found the API of the Guardian Newspaper and obtained an API key (a digital key to show that I was authorised to access the API which gets appended to the Uniform Resource Locator (URL) of the API) I had to create an account with the Guardian so that I could apply for an API key. If I had been a company applying for a key, I would have had to pay but because I am a lone developer they allowed me access for free. I have just renewed the key – I think that the original term was for 3 years. I initially created an app which displayed the top news stories in all of their categories.

Like so…….

The News App – Part 2

The next part of the creation of the News App was to create filters so that the user could choose to view the ten most recent headlines across all categories, the ten most recent headlines across Politics, Business, Environment or Sport:-

The settings to allow this are accessed by clicking the “kebab” menu, that is the three vertical dots in the top right hand corner of the news page. The second picture shows the menus and there are two things to choose:-

  • Latest or Relevance (to the category chosen).
  • All news or a single category as illustrated in the subsequent pictures.

The headlines are shown in real time if you chose “Most Recent” for the chosen category and if you click on the headline you are then taken to the full story on the Guardian Website so that you can read it.

Finally, I gave it the name “Here is the News” and created an Icon to make it stand out from other apps on my device. I up-loaded the code to my GitHub repository where it remains together with the code from my other apps – including the ones that I have not told you about yet! There’s more to come!

The Tour Guide App

We had started to create multi-page apps and now to build on that we were tasked with building a Tour Guide app. The brief was to make our own multi-screen Android app to share our knowledge about a city that we knew well. It was to include top attractions, restaurants, public places or events for the city. We were shown how to create proper data structures to store lists of information and then build layouts to display those lists of data. We were to navigate through those lists in Fragments using a ViewPager or Navigation Drawer; creating out own custom classes to do so and properly handling images and/or audio if applicable.

I chose to base my Tour App on the City of Nottingham and I included places to stay – mostly hotels, places to eat – restaurants and takeaways, places to explore like Theatres and castles, and finally, a section on Museums. Each item on each of the lists when clicked takes you to the venue’s website and navigating between lists is as easy as a swipe left or right.

Creation of this app introduced me to allowing permissions in the manifest (Internet) and making those Arrays of the data and image assets. It was also the first time that I had come across Fragments usefully. I had read about them in Stack Overflow posts but until this time they had remained some mystical far off land to be explored sometime in the future. We were also encouraged to up our game in terms of styling and polish of our app. I was very pleased with this app and I may well go back and add extra venues and categories to make it more complete and useful – once the Covid-19 pandemic is over and people can get out to visit these sorts of places.

When most people think of Nottingham they probably think “Robin Hood” who was probably not a real person but a couple of fun facts; D.H. Lawrence lived and wrote just outside of Nottingham in Eastwood and William Booth founded the Salvation Army in Nottingham and there is a museum to him and the Salvation Army in Nottingham centre. It is in my app just a bit lower on the museums page.

Are you sitting comfortably…

As you may well have read in my “About” section, I was once a Registered Nurse and later, a Resuscitation trainer – this little factoid will come in useful once I get to the bit where I describe what I have been working on recently. Please bear with me. I had always taken photographs and thought that it would be a jolly wheeze if I was to retire early and make a living as a photographer. I have a photography blog which gives a fuller picture of the photography adventure (link on header to each page if you are interested – please visit at least once) but suffice to say, it didn’t bring the fame and fortune that I craved. During that time I started to play with Android photo editing apps on my phone after a very talented photographer called Gerry Coe came to the local camera club that I attended. He had won numerous awards for his photography and had moved on to win awards with his iPhone photography. I was hooked. I started to play with Snapseed, Picsart, PhotoLabPro, Prisma, and a whole lot more using my photographs and posting them on my Photo Instagram page*. My next thought was to see if I could find out how to write an Android photo app for myself. I mentioned this to a friend of mine one evening at the camera club and the following morning, he sent me a link to Google Garage where they were offering scholarships to study for one of four Google Nanodegrees.

  • Android Basics Nanodegree
  • Android (advanced) Nanodegree
  • Android Basics Web development Nanodegree
  • Android (advanced) Web development Nanodegree

At the age of 56 I decided to apply for the Android Basics Nanodegree; I did not have any previous experience of writing code, just a kid with a crazy dream!

I applied and was accepted. The course was run by Udacity and the first stage was “The Google Developer Challenge”

The scholarship was for three months and there were 20,000 selected across Europe for each of the two basic strands and 10,000 for each of the more advanced strands. I did well in the first phase and was given another scholarship to study for a further six months for the full Nanodegree. There were only 2000 people on each strand invited to continue and I was one of the fortunate ones.

There will be more about my journey through my Nanodegree with Udacity in my next post.

*I have two Instagram pages; a photography page (@paulcullenphoto) for which there is a link through my photography website and a new “Developer” page (@cullendevelopment) to which this website is linked.

I have a third site “uncorked bottle” (link under header on each page) if you are interested in my wine blog.