Hello and welcome back. My latest Flutter and Dart project is my body mass index calculator or as some know it BMI. Body mass index is a somewhat out of vogue way of assessing if someone is of a healthy weight for their height and quite rightly so, many a professional Rugby player will have a BMI of 35 or above, particularly those forwards who are all muscle and muscle weighs more than fat. A safer option would be to assess %fat content but that is more difficult so I think that BMI calculation will be around for a bit longer yet so this app may well prove helpful. The calculation for body mass index is:-
BMI = weight in kilograms / (height in metres x height in metres) (substitute * for x if you prefer!).
My app also has a calculator for conversion of imperial weights (stones and pounds – British not US) to metric (kg), and another for imperial height or length (feet and inches) to metric (metres) which can them be used for the BMI calculator. I have included a calculate button for each calculation and a reset button to clear all of the boxes.
The Flutter Version of the BMI Calculator app.
It is the Flutter version of part of a previous Android app with several calculators within it. My intention is to ask those to whom I show all of these Flutter calculation apps which ones they would like to see as a suite and which would not be useful to them. I intend to have several sites; perhaps a paediatric suite and an adult based suite and target them at appropriate audiences. If you have any thoughts on the matter, please feel free to share them with me. Thank you.
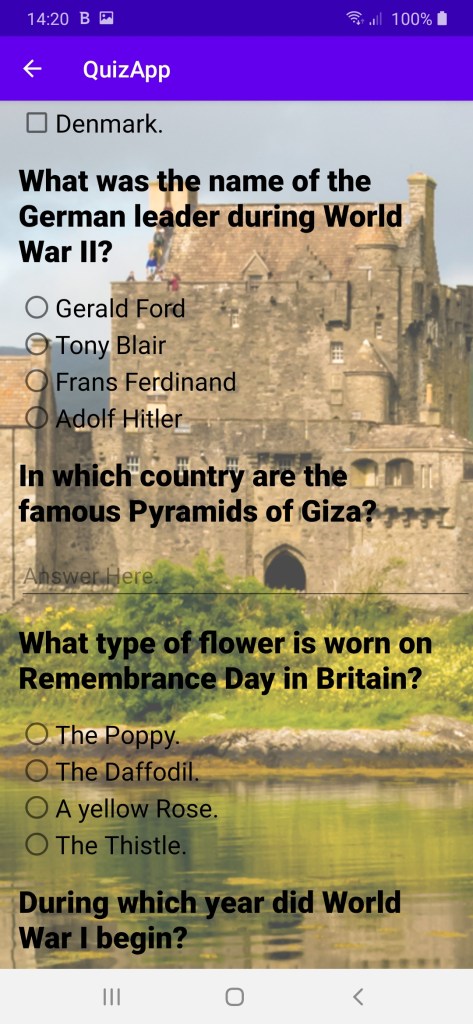
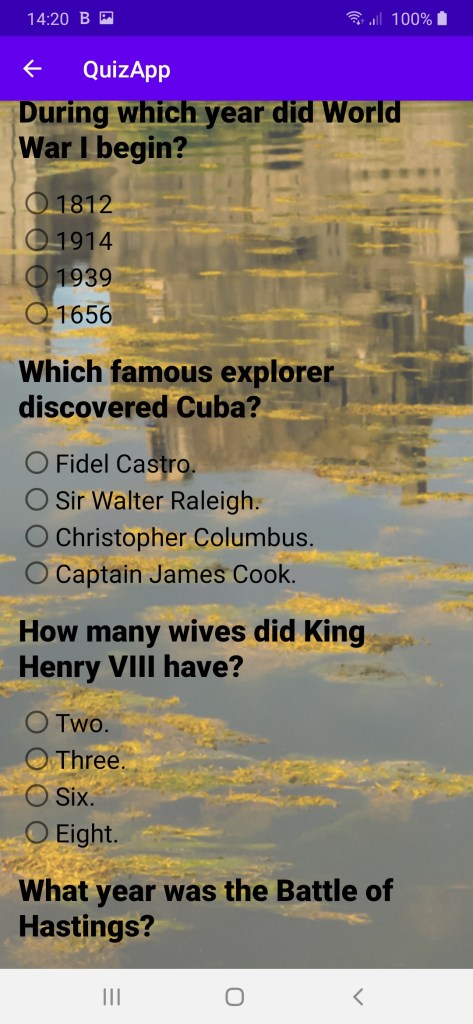
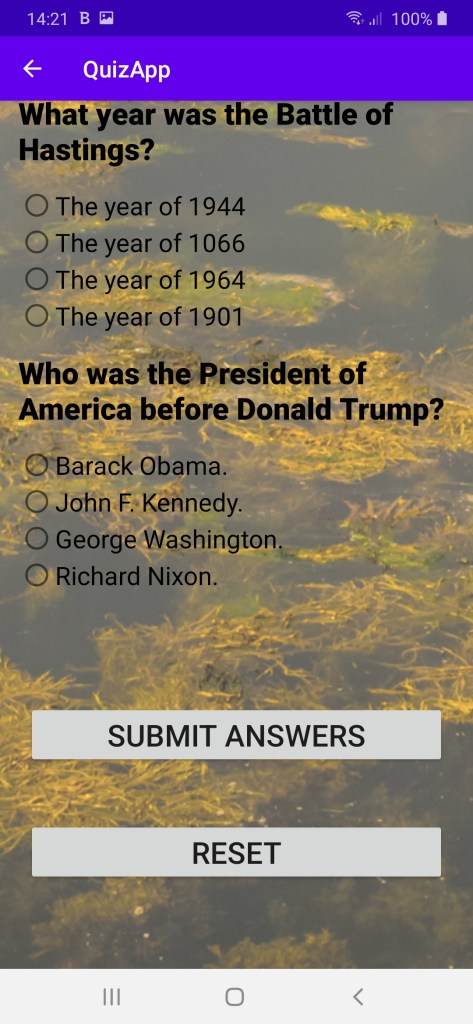
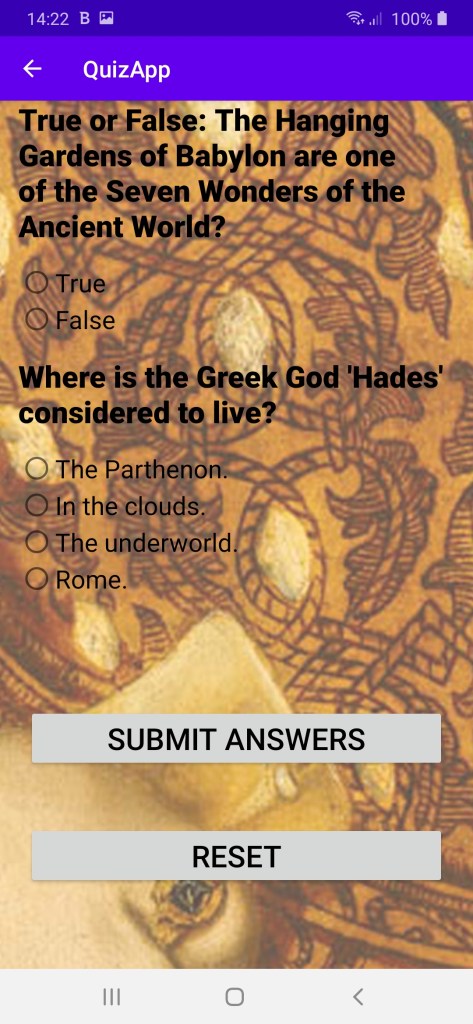
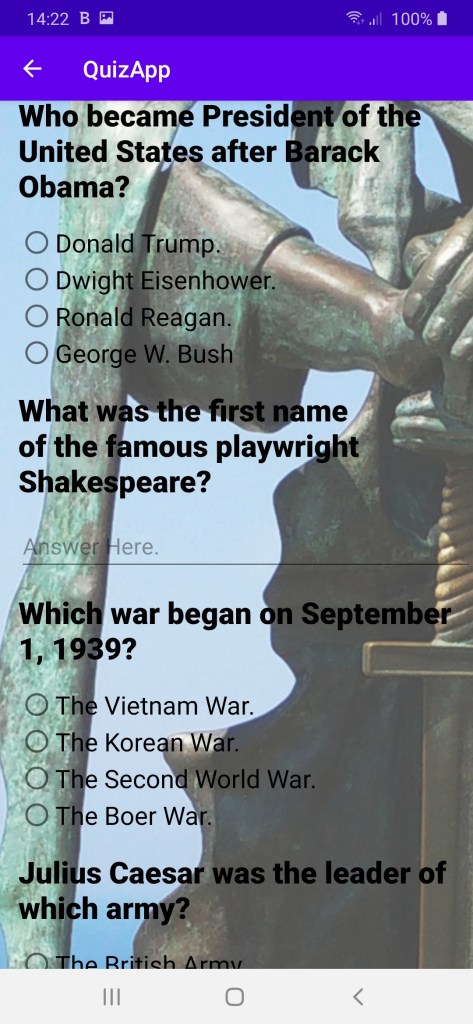
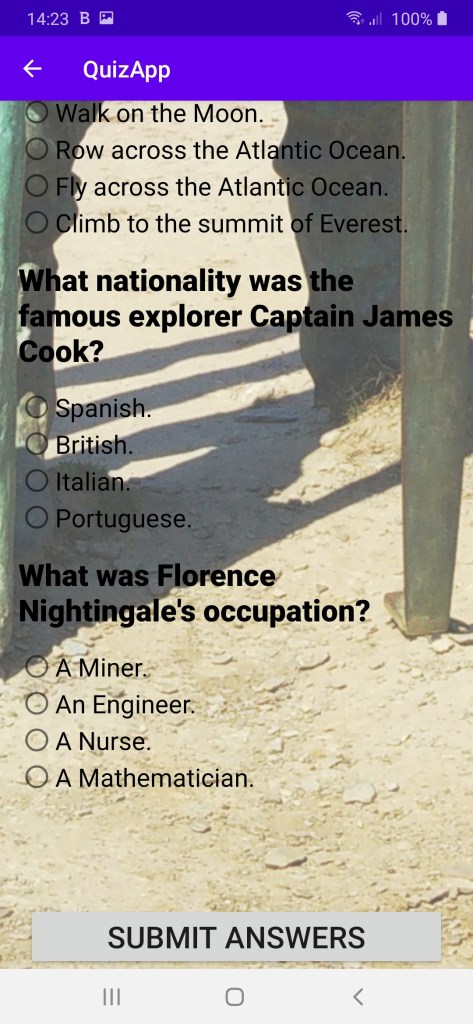
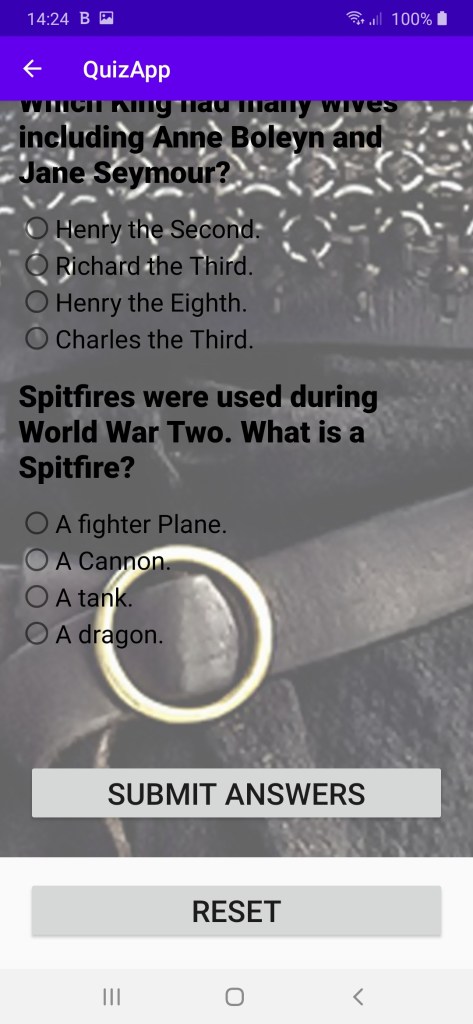
My daughter is a primary school teacher and holds a Master of Arts Degree in History. I thought that it would be a jolly wheeze if I was to attempt to create a quiz app that might be useful to her endeavours, or at least amuse her. It would also give me an idea for a project – sometimes as an app developer, finding an idea for a project is the most difficult thing. I made it and although it wasn’t suitable for her target audience, I am quite proud of it. There are problems with it, such as the fact that it is difficult to make out the text in front of the background illustrations (some of which are my photographs – Eilean Donan Castle and Gallos from Tintagel castle – look it up!) but it was progress.
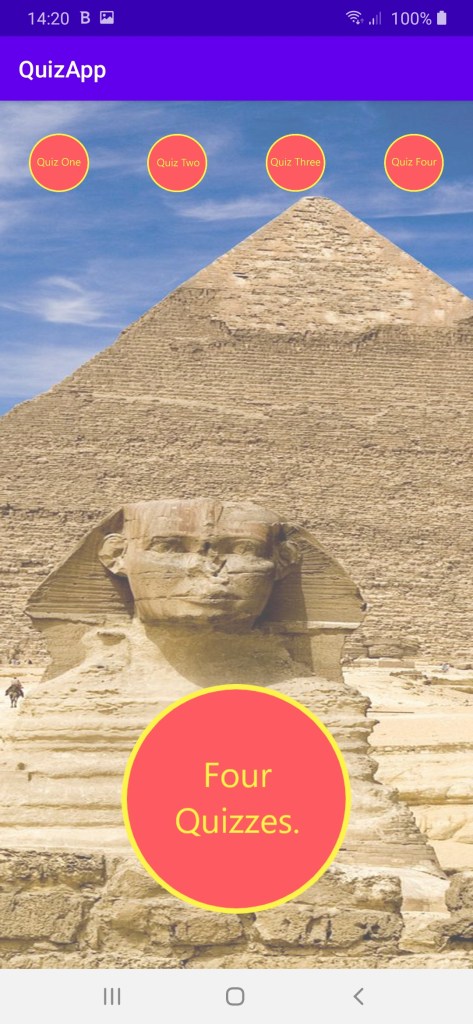
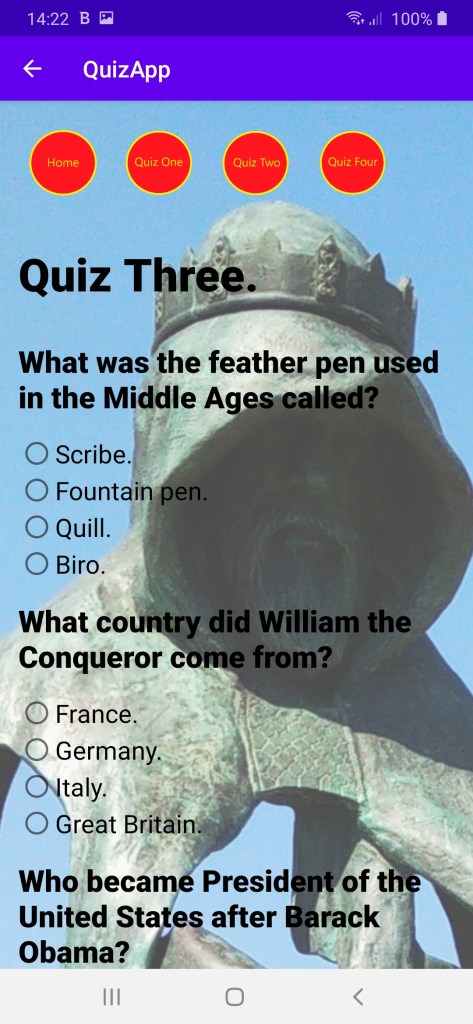
Four Quizzes in One.
The front page and links to the other four pages.
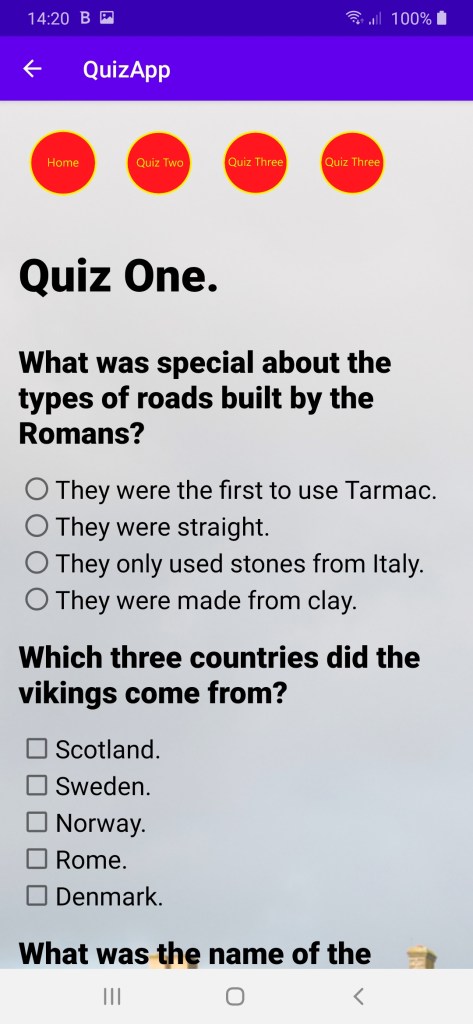
It was a first attempt at a quiz app for more than as an educational project. I had created a much less elaborate quiz as a project for my Udacity Android Basics Nanodegree; this quiz was based on the techniques that I had used then. I had created each quiz in a ScrollView – it seems to be frowned on now but I thought it appropriate at the time. The questions use a selection of radio buttons (only allows one choice), grouped check boxes (allows a pre-set number of choices) and each quiz has an edit text (user text input). When the user presses ‘Submit Answers’ it tells them how many points out of a maximum score and if they achieve a perfect score, it displays another message which tells them that they scored a maximum ” ” points (it varies between the quizzes). Finally, each individual quiz can be reset by pressing – you guessed it , the ‘Reset’ button. What’s not to like?
I wanted to create something useful and given my background in Nursing and all things medical, I was naturally inclined to come up with something that might prove useful to my former colleagues and those who perform a similar role as that is what I know most about.
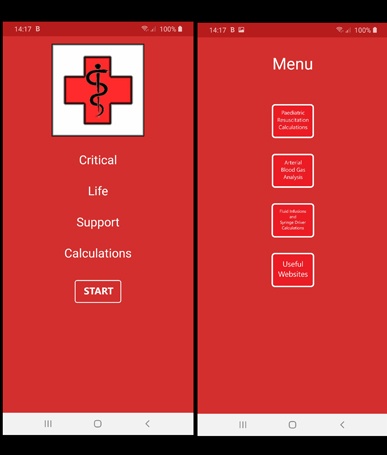
One of the things that computers do well (and your mobile device is a sophisticated computer) is crunch numbers quicker than a speeding bullet and certainly faster than human brains and what is more, if they have been given the right instructions in the first place, they will do it faultlessly at every time of asking – better than humans there too then. In short, I wanted to simplify peoples lives by taking away some of those routine calculations. Here is my first attempt. It was written in Android Studio solely to work on Android devices. In later iterations I added extra functionality to it, of which I will tell you at a later time. For now, this is the first version:-
The first medical calculations app for Android.
Detail of Android version of Paediatric Resuscitation app for Android
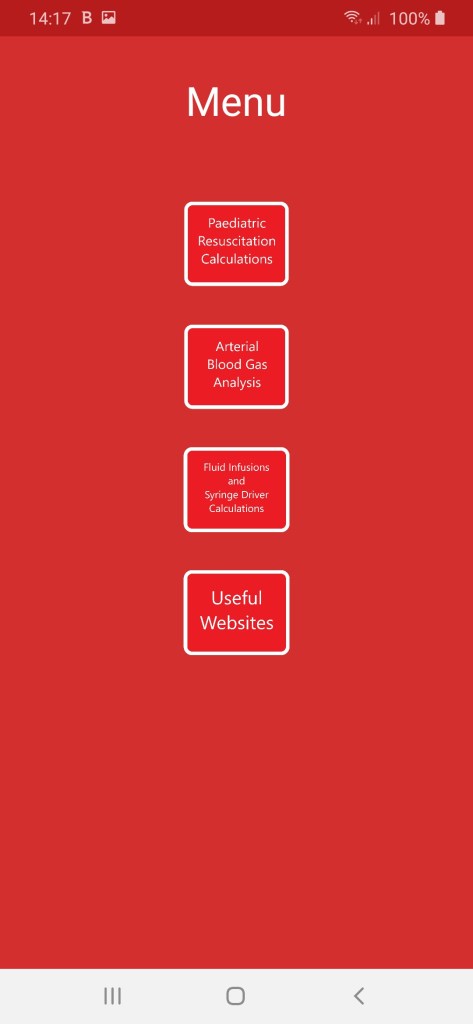
The Menu
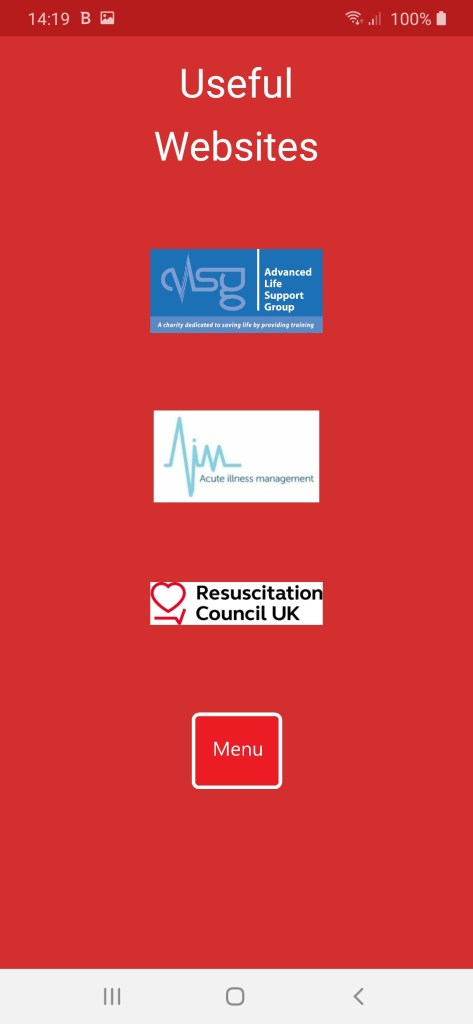
Links to useful websites.
If you want detail about how the resuscitation app works, please see the Flutter version post from a couple of days ago. I’ll talk about the fluid calculation app soon. See you later…
It is probably not on your usual list of daily considerations but for some people it is. Those people are very talented doctors who treat children and in particular very small children as this calculation is used to decide what dose of drugs to give to these children and to decide on other very critical treatments.
The calculation is:-
Body Surface area = the square root of ((weight in kilograms x length in centimetres)/3600)
The method is known as the Mosteller method.
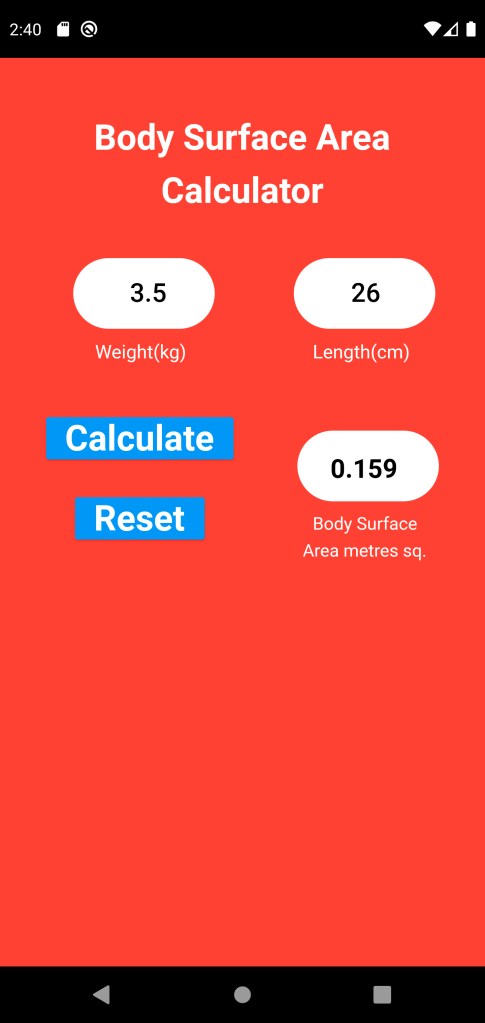
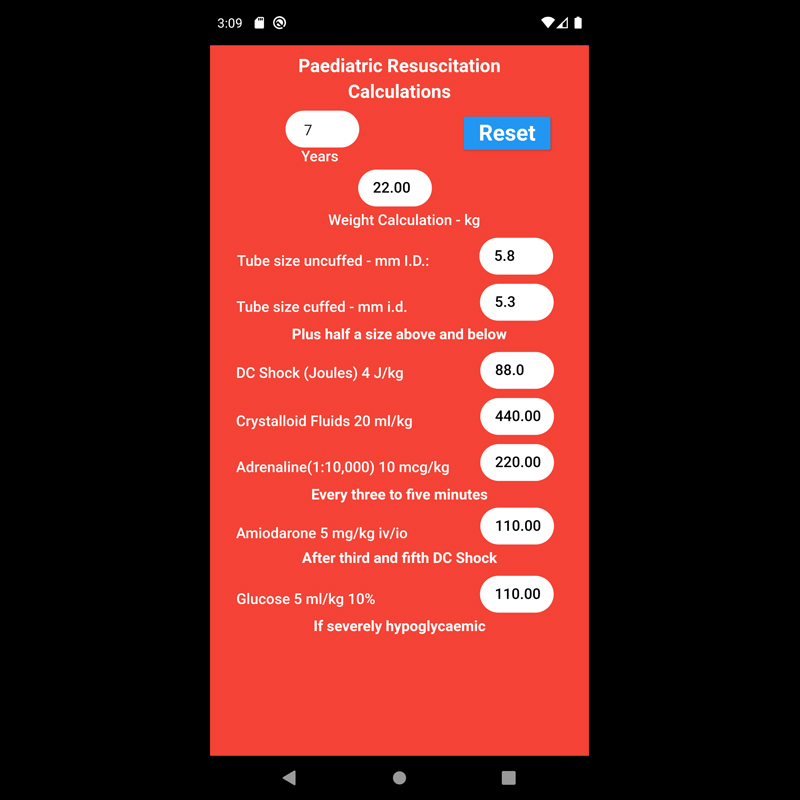
The Flutter Version.
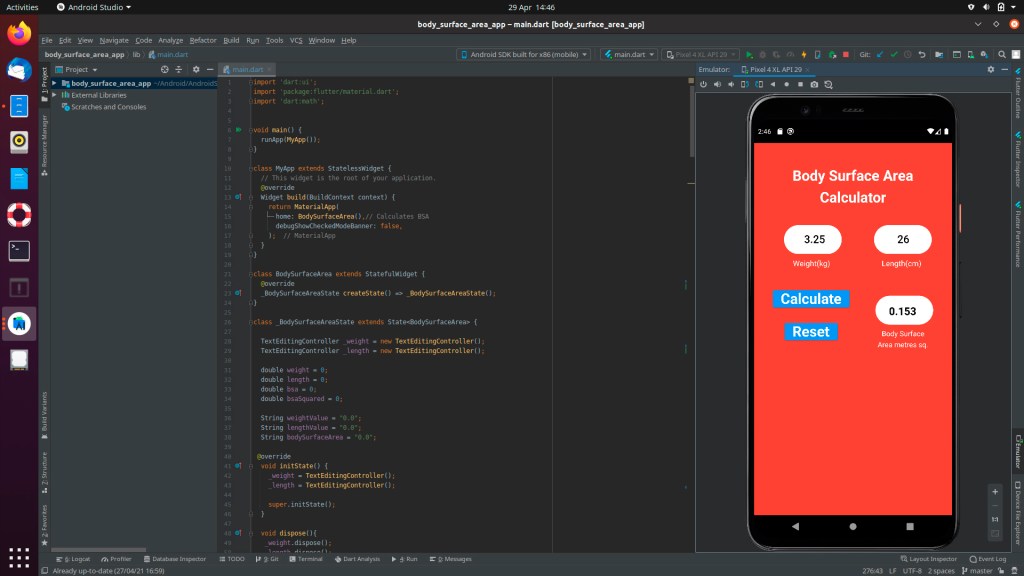
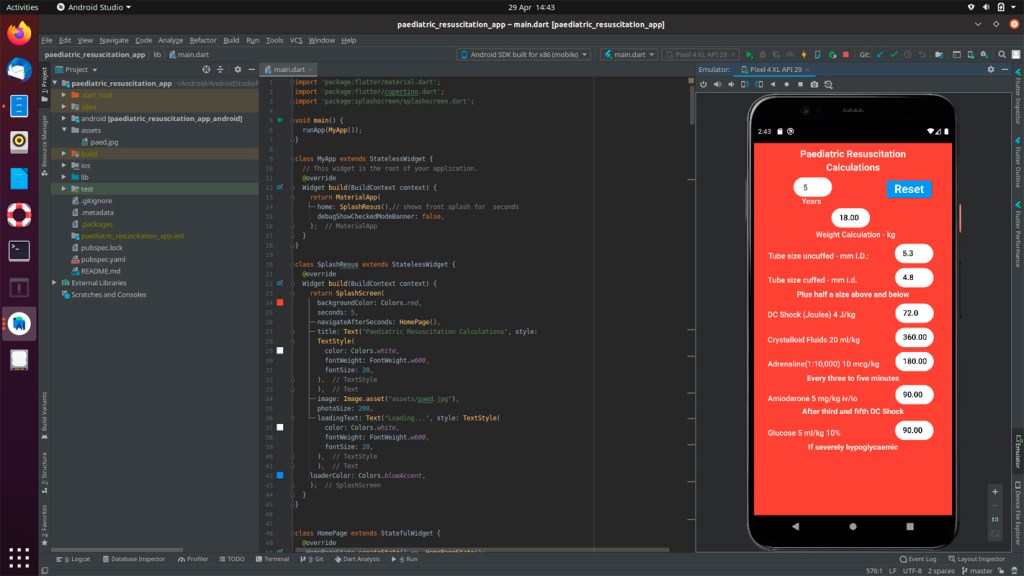
As it appears in the emulator in Android Studio.
Users type in the weight and length and press ‘Calculate’ then to reset the app press ‘Reset’ – simples…
Again, this app is quite niche but may prove useful if this is your line of work. The final outcome is likely to be that this will be included as part of a suite of specialist applications. In this form I hope to make it available for both Android and iOS. See you soon…
You have recently read about how I spent a bit of time studying Flutter and Dart with a free course from Udemy. The first personal project that I have commenced is to convert a medical calculations app that I initially created in Android. It included an app to calculate drug and fluid doses used in paediatric cardiac arrest, a body mass index calculator, a fluid infusion rate calculator, a body surface area calculator (used to calculate drug doses for babies), and two metric unit calculators which work in different ways (volumes and lengths). In it’s original form, the app would only work on Android devices. I wanted to present an app or a series of apps that can be used on both Android and iOS so to recreate them in Flutter would be one way of achieving that.
I decided to convert each part of the original Android app separately and I started with the Paediatric Resuscitation dose calculator.
The Flutter version of my Paediatric Resuscitation Calculator.The Android version (set in ScrollView).
When children get sick it is often not serious but they can deteriorate very quickly and when they do it is important to recognise the signs and act upon then quickly. Often it is to do with dehydration, sepsis due to infection, a low blood sugar or trauma and the story with which they present may give you clues as to what the problem is. A thorough assessment of the patency of their airway, their work of breathing, their circulation, their level of consciousness and any injuries over the whole of their bodies – correcting problems as you go in this priority order is the way to go – not leaving ‘any stone unturned!’. Hopefully, you can reverse the decline and make the child well again. This is the best outcome. Sick children tend to be very resilient to a point and it is up to this point that you have the best chance of success and this success comes by good assessment as above BUT if that window of opportunity is missed the sick child will ‘crash’ quickly and may even go into cardiac arrest. The calculations made by this app are those taught to Doctors, Nurses and other healthcare professionals in how to deal with very sick children and those who have gone into cardiac arrest. The Resuscitation Council UK and the European Resuscitation Council Paediatric resuscitation courses teach these calculations in the case of Paediatric Cardiac arrest. In practice, paediatric resuscitation teams are calculating these numbers as they chase down the hospital corridors to respond to the emergency but my motivation for writing this particular app was for the paediatric ward nurses and doctors who would be involved with resuscitating the child so that they can be be better prepared with drugs and fluids when the ‘team’ arrives. In my experience of being an instructor on Paediatric Resuscitation courses it seemed to me that whilst the attendees were able to do the calculations, they had to have a refresher about what formulae to use as they were not using them all of the time so if it were used it might save them preparation time and stress.
All of the calculations are based on the child’s age as this is reckoned to provide to most accurate calculations in this situation. Users of this app just type in the child’s age and the app will calculate the child’s (likely) weight, the size of uncuffed endotracheal tube (for those under 8years old), the size of cuffed endotracheal tube (for those 8 and over), how much of a DC electrical shock to give them – measured in joules and based on their calculated weight, how much crystalloid fluid to give as a bolus (isotonic sodium chloride or compound sodium lactate) which can be repeated if necessary, how much adrenaline to give as a bolus (which can be repeated every three to five minutes), how much amiodarone could be given if necessary and how much glucose can be given if necessary for very low blood sugar.
Not all of these calculations will be needed but by the same token some of the calculations would be appropriate for emergency treatment of very sick children, not just those in cardiac arrest. Young children particularly will collapse and even arrest due to low fluid volume – dehydration (due to diarrhoea, vomiting, haemorrhage or severe sepsis – the fluid calculation will be of particular importance), low blood sugar (so the glucose calculation will be important). It is unusual for a young child to suffer from a primary cardiac cause unless they were born with it. With severe dehydration there can be a salt imbalance which can cause cardiac problems. It is with older ‘children’ that a primarily cardiac cause might be suspected as adolescents and young adults can suffer from sudden arrhythmias which can cause collapse and cardiac arrest. This is mainly where the DC Shock and amiodarone calculations come into play most frequently as they are used to correct these arrhythmias. The DC shock is delivered by a defibrillator (in manual mode usually by a medical professional with proven rhythm recognition skills.
It is a bit niche but I think that it could be useful for those less familiar with the calculations but may be called to assist in the ‘resuscitation’ (including fluid resuscitation) of a child in a non-critical care healthcare environment such as a standard children’s ward. Once I finish the whole suite of calculation apps in Flutter, I will consult with a former colleague of mine from when I was a Resuscitation Officer who is Lead Paediatric Officer at my local (large) NHS Trust to see what she thinks about it. I showed her photos of the original Android version and she expressed an interest so we will see. Wish me luck!
For those of you that want to see pictures of Android Studio:-
I know, I have been away a little while but I have been learning new things. I have produced a few prototype apps since my graduation from the Udacity and Google Android Basics Nanodegree (that I have yet to tell you about) but one problem that I face is that they only work on one mobile platform – Android. I bumped into an old colleague of mine from my nursing days; she was a “Matron” and a lot of her work involved filling paper forms and then manually sending them in various directions, most of them digital. Together we came up with an idea for an app to help to automate the process which would save time and effort in her very busy day. I went away to start to design something suitable when I hit a major snag. I develop Android and the hospital trust where she worked issued Apple phones using iOS. It made me think and my solution for the future was that I would have to learn to develop apps for Apple devices too because I was going to hit this roadblock every time with any apps that I created. I wasn’t quite sure where to start. Too much time passed between my conversation with my ex-colleague and the opportunity passed for that project but there would be other times when I hit a similar problem so I was going to have to tackle it.
My initial course of action was to research how to create iOS apps and I found that I would have to look at Objective C, X Code and Swift with a nod towards OS X as well. The code should be similar to what I had become used to being C based languages like the Java that I have been developing my Android apps with. I figured that if I was to make my apps available to everyone I would have to cover Android and iOS (and possibly OS X). It was going to take some time to achieve.
I have had my (Photography) Instagram account for many years and initially I started to share my apps on that account but they were about as popular as a Rattle Snake in a lucky dip – very little response from my established followers who were really there to see my photographs. I opened a new Instagram account based on my Software Development exploits to discuss and share items related to that. One of the growing trends was Flutter – lots and lots of people were talking about it and saying that they were developing apps using it. I investigated and found that it could be very useful to me in overcoming my “problem”.
In case you are not familiar with it, Flutter – developed by Google, enables app developers to create apps once which can be suitable for both iOS and Android. It is not a perfect solution, some apps don’t do so well with it and I understand that it is a bit less swift on end user devices but I could put it to good use for most if not all of my simple offerings. Another piece of fortune; one of my new followers has a website that publishes vouchers for Udemy courses which are available for limited periods. I have taken advantage of this twice now; firstly for the Java course that I recently completed and then another which the trainers called “30 days of Flutter” which was 10 hours of video tuition about building Android and iOS apps using Flutter and Dart. The two work together but Flutter largely related to the User Experience/User Interface part and the Dart is the “doing” parts – where the number crunching goes on and it is written in .dart files.
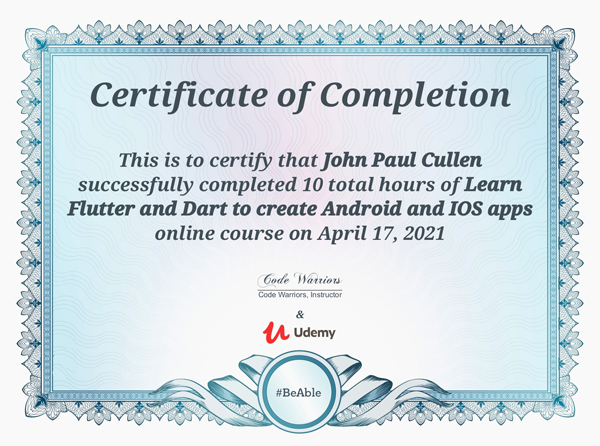
I completed the course on the evening of the 17th of April 2021 and I am looking forward to adapting some of my Android apps and creating new ones using Flutter and Dart.
I still intend to learn how to code “Native” iOS apps but at least I can get some cross-platform apps out in the meantime.
I graduated with Android Basics Nanodegree by Google and through Udacity on the 31st July 2018 – I think that the cut-off date was 20th August 2018 so I was only a few days ahead of schedule. Udacity extended the deadline by a few weeks because I think that there were still quite a few people who were going to miss it! After the extended deadline, the people who had still not completed were given a “preferential rate” in order to complete, which several people took advantage of.
My Certificate.
I was ever so proud as you might expect but then I started to think “now what do I do?” The tutors on the course suggested that we use our new found knowledge to adapt the projects that we had created throughout the course to fit the needs of local shops and businesses in our areas. For me it was a question of confidence and a search for ideas about how I was going to proceed. More about that next time….
This was the final project that I studied for and created on my Android Basics Nanodegree by Google and it was to be done in two parts. In the first part we were to focus on what happens behind the scenes – designing and implementing a simple database using SQLite; creating a table and then populating that table with new entries, modifying the entries and displaying the contents of the table to users. The practice app that we used in preparation for our project was an app to track pets in an animal centre in which we had to create a list of existing pets, and let the users add and edit the pets – names, weights, breed and so on. During the second part, the practice part was to build a user interface so that we could manipulate the database more easily.
The final project was to create our own Inventory app that would allow a store to keep track of it’s inventory. The brief was to:-
Be able to store information on a SQLite database
Integrate Android’s file system into that database
Present information from files and SQLite databases to users.
Be able to update information based on user input.
And create intents to other apps using stored information.
This is what the front page of the app looks like when the database is empty.
When the database is empty there is a message on the front of the app encouraging users to enter products into the database. On clicking the “kebab” menu in the top right hand corner there is an option to add sample data for testing but the usual way to add data to the database is to click on the green button on the bottom right of the page which takes you to:-
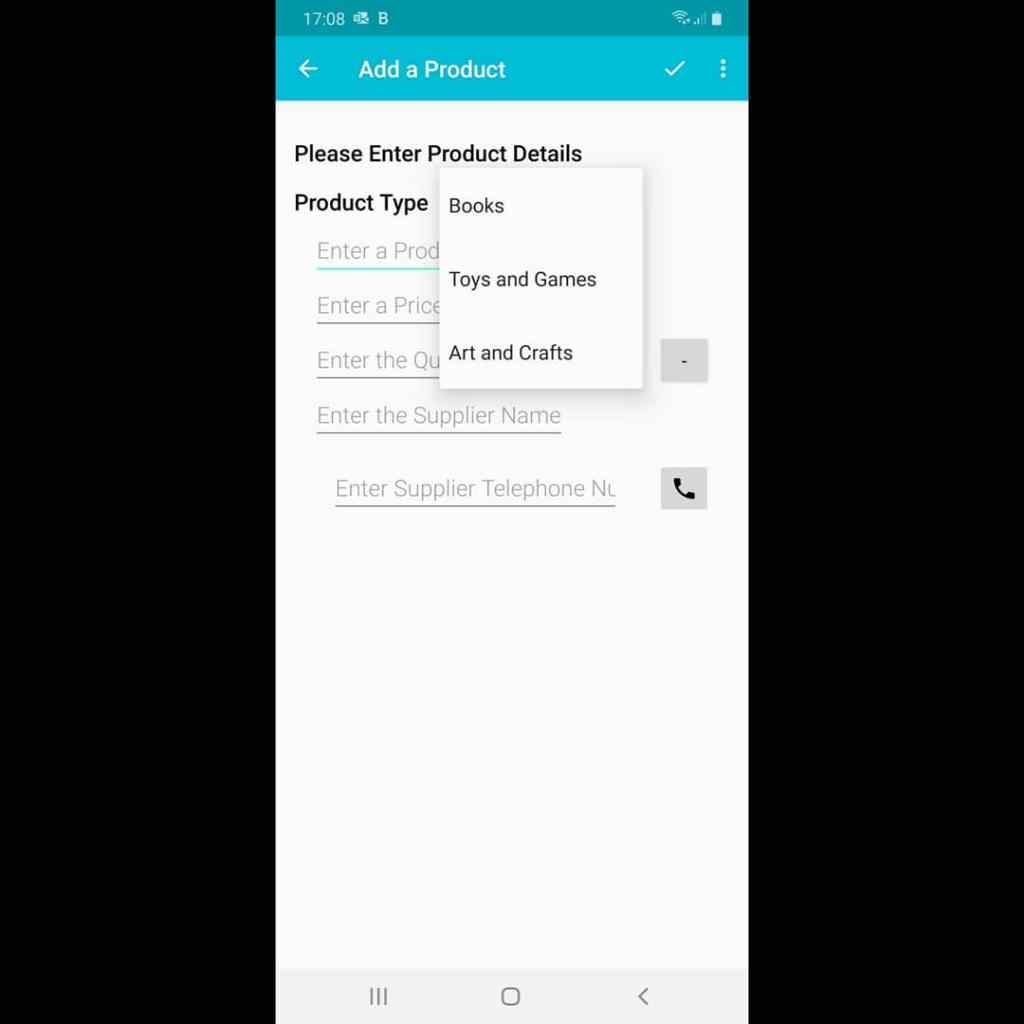
The “Add a product” page.
On the “Add a Product” page you can add relevant data about your product. On this page you can enter the product name, price, quantity with the additional function of making small adjustments with “+” and “-” buttons, the supplier name and the supplier telephone number which links via an intent to the telephoning intent. The app is based on the idea of a book, stationery and toy shop so there is a drop down list to select whether the product is a Book, a toy or a stationery item.
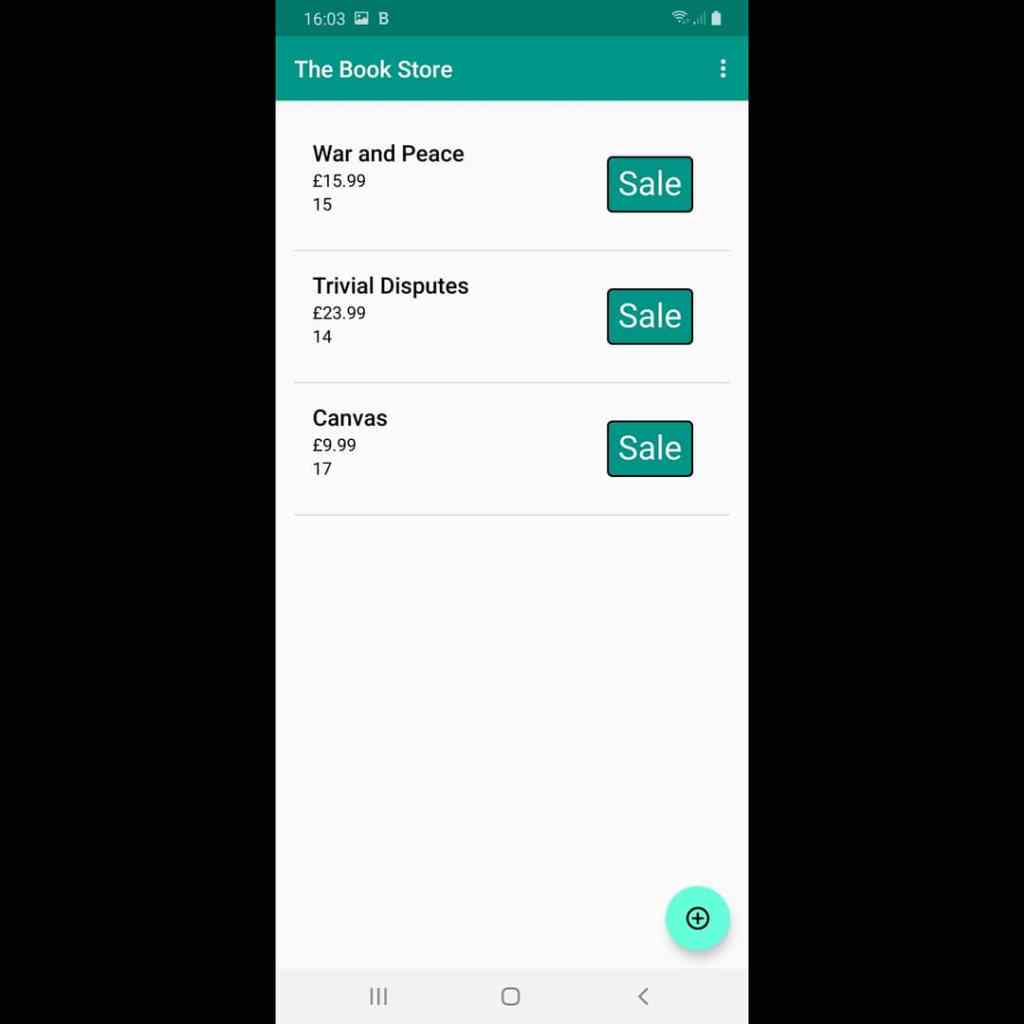
This is what the front page of the app looks like when the database is populated:-
The front page of the app when populated.
The type in bold shows the product name, below that is the price and below that is the number in stock. A sale is recorded by pressing the “Sale” button on the relevant item which reduces the stock number by one. If you click on the product instead, you can edit the details of the product in the case of inaccurate description, price or stock level. The “kebab” menu also allows a menu option to clear the whole database of entries. It was decided that we should only create a simple user interface because the emphasis was to create a usable database but I am sure that this app could be “prettied” and expanded to make it into of commercial value without much change to how it operates.
After I had submitted this project and tied up a few loose ends like making sure that I had been communicative enough on the Slack channels and Udacity blogs – they, quite rightly, put a lot of emphasis on community and communication – it had to wait for the verdict on my last project before graduation. We were also strongly encouraged to build our networks on LinkedIn and Facebook. I had been in LinkedIn and Facebook for some time before but my followers and the amount of people that I follow grew quite a bit as a result of this experience. I am a member of Udacity Graduate Alumni groups on LinkedIn, Facebook and Slack and it is useful to have people with a shared experience to converse with, support and receive support from.
The next stage of my journey with Udacity involved creating an application which takes a JSON feed from an Application Programming Interface (API) and use selective parts of the JSON feed to display news on the app. We used the freely available U.S. Geological survey website API to build an app called “Quake app” which told us where in the world there was an earth quake and of what magnitude – we then created various filters like only show quakes above 5.0 on the Richter Magnitude scale. This was all with code fed to us by Udacity. We then took quake app and used it to create an app for displaying news. We were to:-
Search the internet for available APIs from official news sources.
Obtain an API key if necessary.
Using the quake app as a template, create our news app.
I found the API of the Guardian Newspaper and obtained an API key (a digital key to show that I was authorised to access the API which gets appended to the Uniform Resource Locator (URL) of the API) I had to create an account with the Guardian so that I could apply for an API key. If I had been a company applying for a key, I would have had to pay but because I am a lone developer they allowed me access for free. I have just renewed the key – I think that the original term was for 3 years. I initially created an app which displayed the top news stories in all of their categories.
Like so…….
The News App – Part 2
The next part of the creation of the News App was to create filters so that the user could choose to view the ten most recent headlines across all categories, the ten most recent headlines across Politics, Business, Environment or Sport:-
The settings to allow this are accessed by clicking the “kebab” menu, that is the three vertical dots in the top right hand corner of the news page. The second picture shows the menus and there are two things to choose:-
Latest or Relevance (to the category chosen).
All news or a single category as illustrated in the subsequent pictures.
The headlines are shown in real time if you chose “Most Recent” for the chosen category and if you click on the headline you are then taken to the full story on the Guardian Website so that you can read it.
Finally, I gave it the name “Here is the News” and created an Icon to make it stand out from other apps on my device. I up-loaded the code to my GitHub repository where it remains together with the code from my other apps – including the ones that I have not told you about yet! There’s more to come!
Today I have completed the Practical Java Basics Course with Real-life Examples online course from Udemy. I decided to do it as a bit of revision of the Java that I have been writing as part of my Android Development and also, to see if there was any difference when writing purely Java. The principles are the same, particularly at basic level – it covered:-
Setting up your environment (IntelliJ) on Windows, iOS and Linux distributions (Ubuntu specifically).
Your first Java program.
Variables – both primitive and Object references.
Operators, loops, control flow and code blocks.
Methods (functions) and arrays – including multi-level arrays.
I found it useful to see how writing Java that wasn’t connected to my Android Development to see if it differed in anyway; I have always written Java with my Android apps in the past. I found that the principles were the same and in many ways it has helped me to put certain concepts in perspective and a little easier to understand. It was definitely worth doing.
I’ll carry on with the Android journey next time. I look forward to seeing you there…